
Its my turn for the Tek Tutorial over at the Character Cafe Today,
I was asked how do the folds for a pop up card, so here it is,
you will need a piece of card stock that measures 4"wide x 8" long, embellishments of your choice, my choice of digi image is this cute pax the penguin from the Character Cafe store.
and for the second card later in this post just double the amounts of card stock.
Here is a drawn (by myself diagram to help you along)

You need to measure and score a line at 2" and 4",
then mark along the long side of the card at 6",
along the top of the card mark along the short side 2" which is the centre of the top.
Score from the centre top mark at a angle to the 6" mark down the long sides of the card,
then score from the 6" marks down across to the other side at the edge of the 2" score line,
do this from both sides, as you can see in the photo

fold along score lines.
For the single card shown below I normally cut of the top two corners, or you can fold them behind and stick them for extra strength.
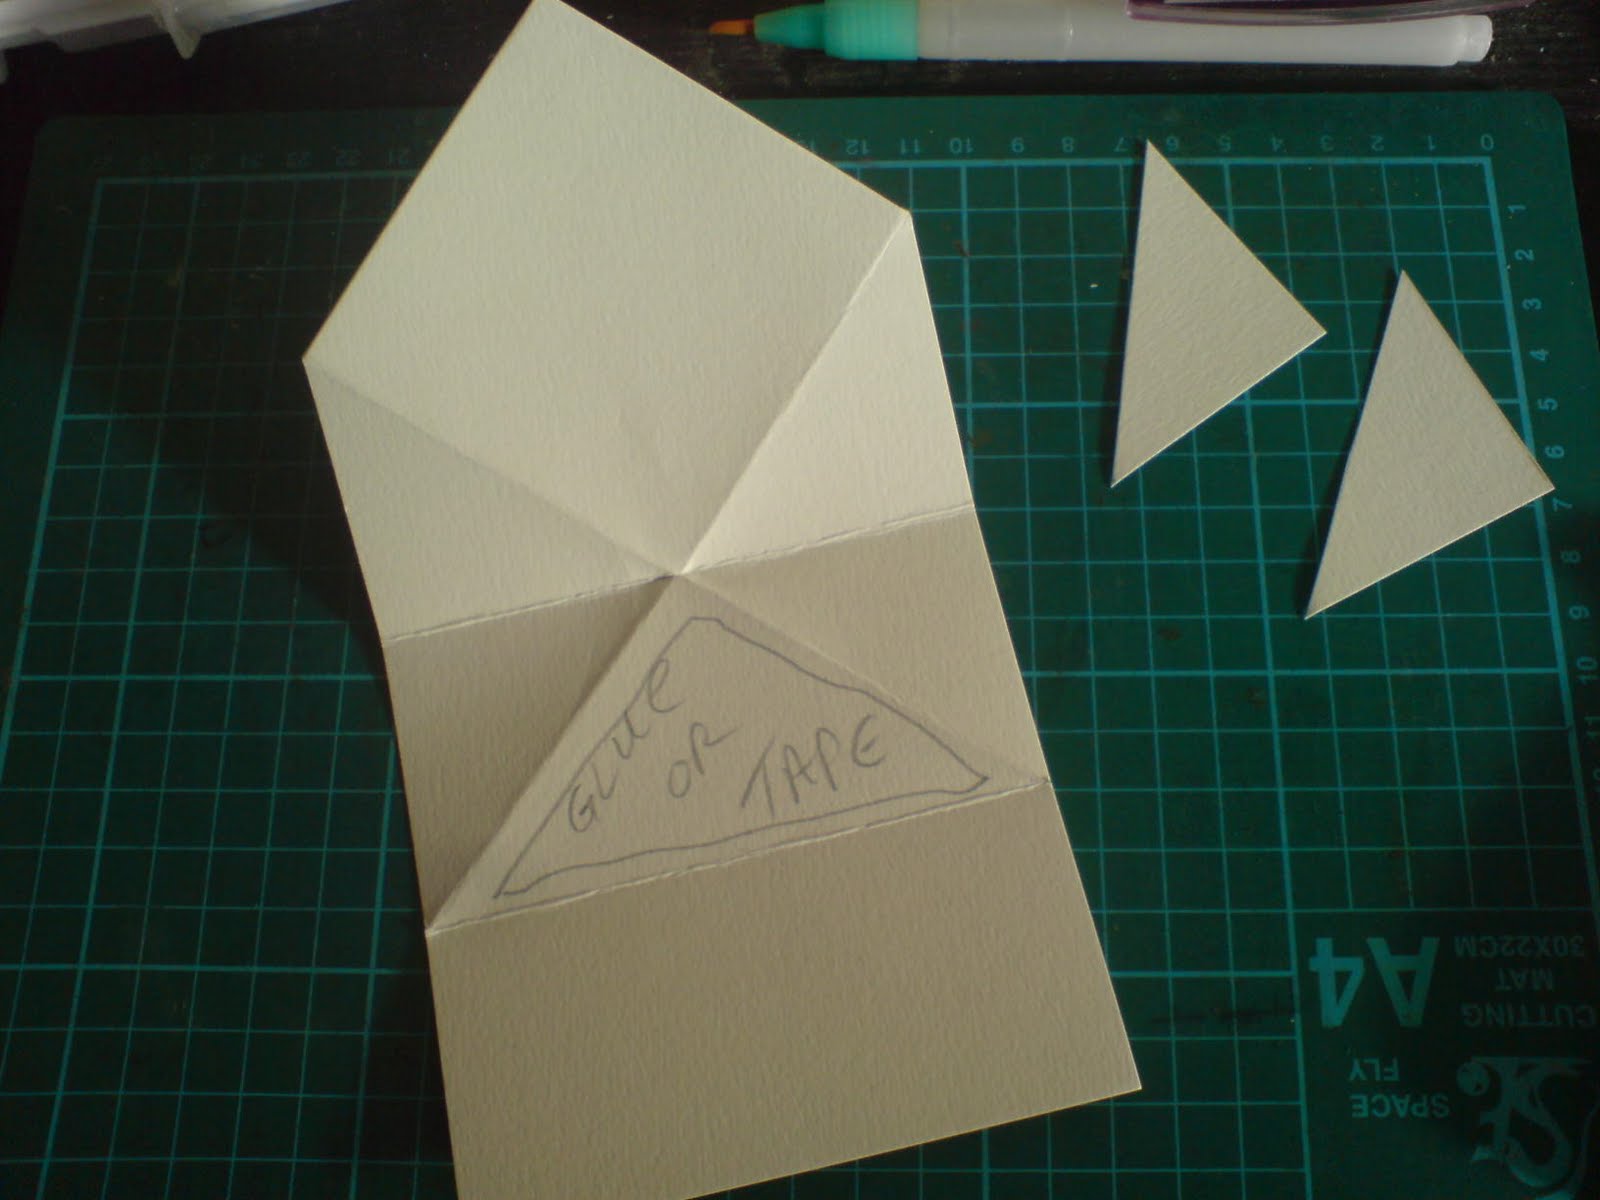
I have marked where you use glue or tape to stick this to the bottom.
(ignore this sticky bit if you are doing the second card shown later in this post)
this should then look like the card below,
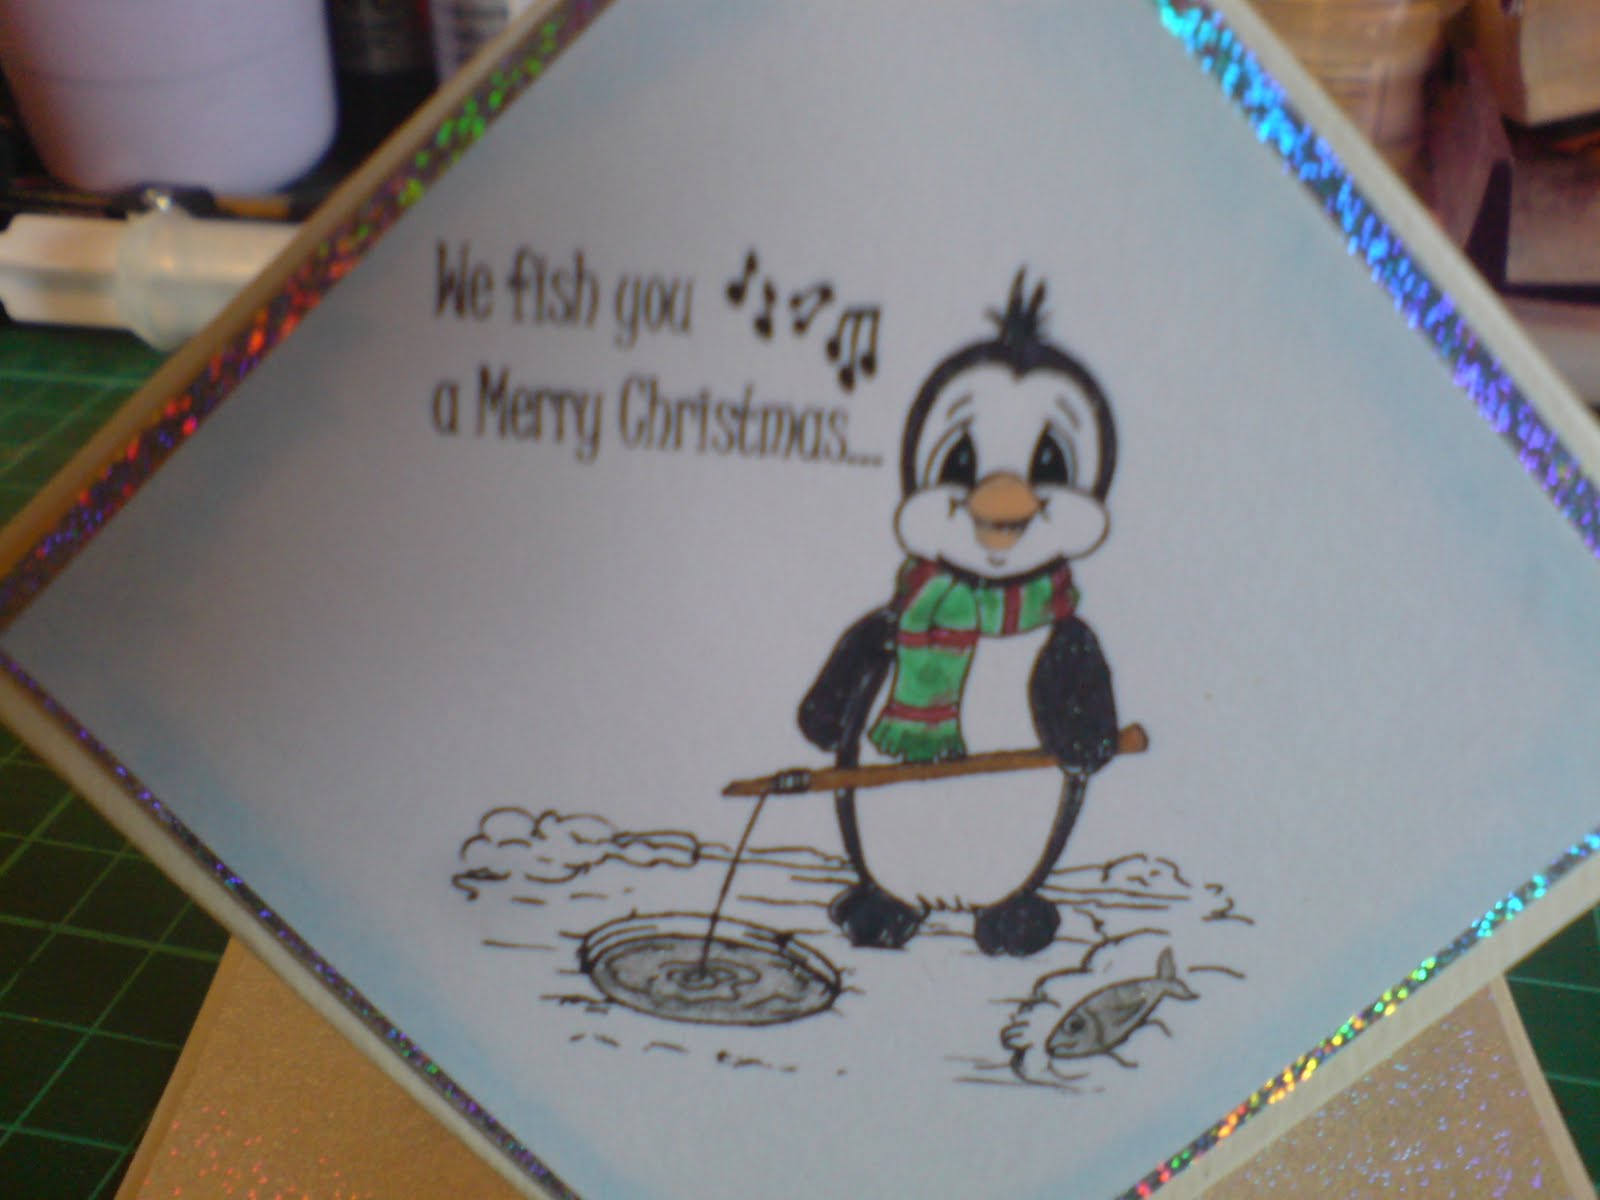
I used sakura pens on this cute penguin image.

Here is a close up of the pop up part with pax the penguin on it,
these fold flat for easy posting as well.
For the second card you do the same as for the card above, but using two pieces of card.
and this time I do cut the top corner off.
once folded you should have two pieces that look like the photo below.
Put tape on ONE of the diamonds like shown in photo.
Then stick one diamond on top of the other to make one card.

Decorate and embellish how you would like,
I have used silver glitter mirri board, and the cute penguin again,

Here is a close up of the image, this time using sakura pens again but in different colours.

Hope to see some of these cards following this tutorial in the Friday Challenge over at The Character Cafe Blog.
I am entering the bottom card into the challenges over at -
Digital Tuesday - Christmas wishes
Cupcake Crafts - Use a Digi Image
Thanks for stopping by today,
and hope this has helped some of you.
Any more ideas for a tutorial using digi images please let me know.
Hugs
Angie
x X x


